What if you wanted to find a report with a keyword search, or search a report preview for specific information or directly e-mail a report to a co-worker? These and other enhancements are available in the new reporting function, #4 from the main menu.
The new reporting function is easy to use and offers a lot of options to filter, export, print, save and preview. It is standardized so that all main options can be used for any report. Reports also have their own individual options which are tailored for the reports. For example, most reports have input parameters for things like selecting date ranges, stores/regions (tiers), rate tables, rental items, etc.
There are three major parts in the report form. The top portion of the form is divided into 6 sections (Document, Print, Page Setup, Navigation, Zoom, and Export). These sections apply to all reports equally. Initially you will see most of the actions greyed out (disabled) but these will become available as appropriate when a report is displayed in the main report preview section.
The left-hand side of the form contains the list of reports available. Initially it lists all reports but you can limit this list in one of three ways. First, you can select a category of reports (“Daily”, for example). Once selected, only the reports associated with the category are listed. Select the category by either using the Drop Down immediately above the Keyword field or use the Reports icon on the top of the form.
Another method for selecting reports is to use the Keyword field.
The final way to list reports is to use the Favorites icon. If you use certain reports on a regular basis, you can now save them as “favorites”. To do this you just right click on the desired report and select “Save as Favorite”. Then to list your favorite reports you just click on the down arrow on the Favorites icon.
The right-hand section of the report form is the report preview section. When this section is blue (empty) then either a report hasn’t been selected yet or there is nothing to report. A message in the center of the section will let you know which is which. To preview a report, select the report wanted, change the report parameters as desired, then click on preview. Once the report is displayed you can use the options in the top sections to print, export, e-mail, save or find specific information in the report, etc.
The new report function is near completion. 87% of the current “legacy” reports have been converted, and ten new reports have been added.
The Ten New Reports
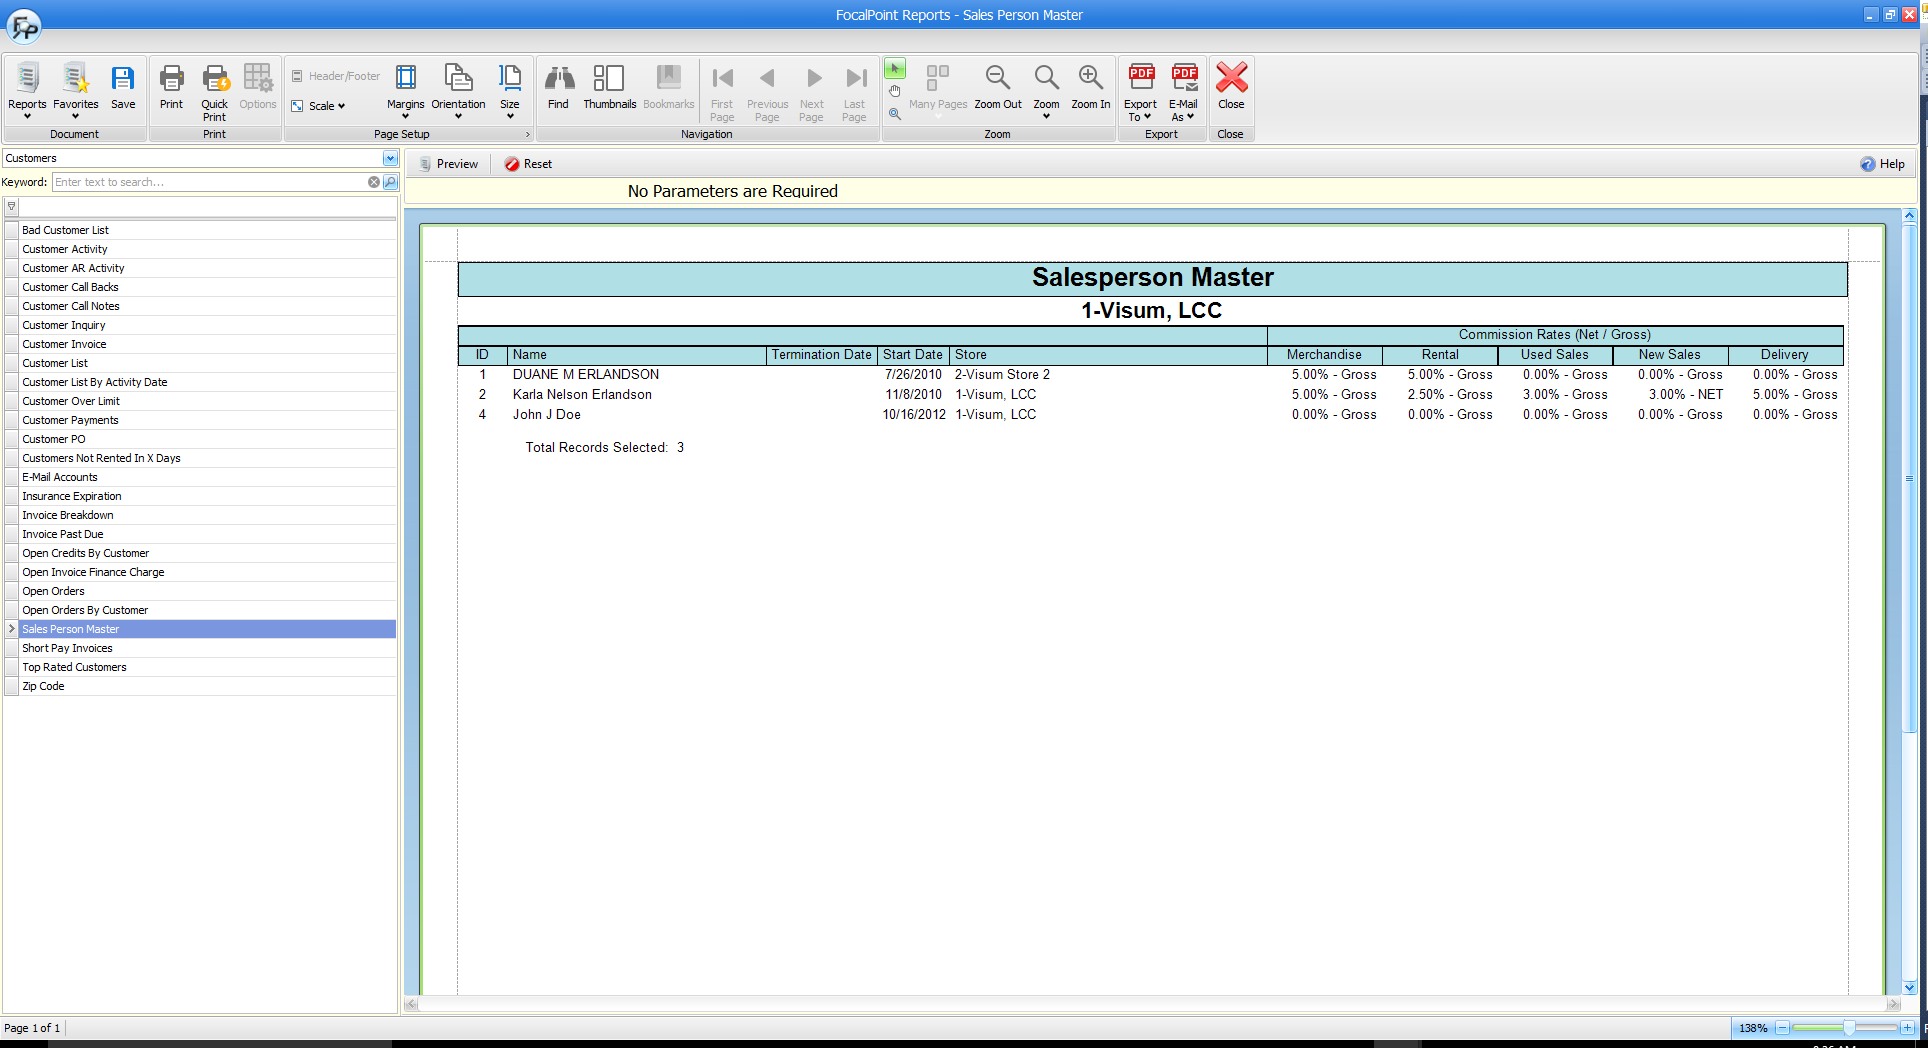
- Salesperson Master Report
- Salesperson Monthly Quote Report
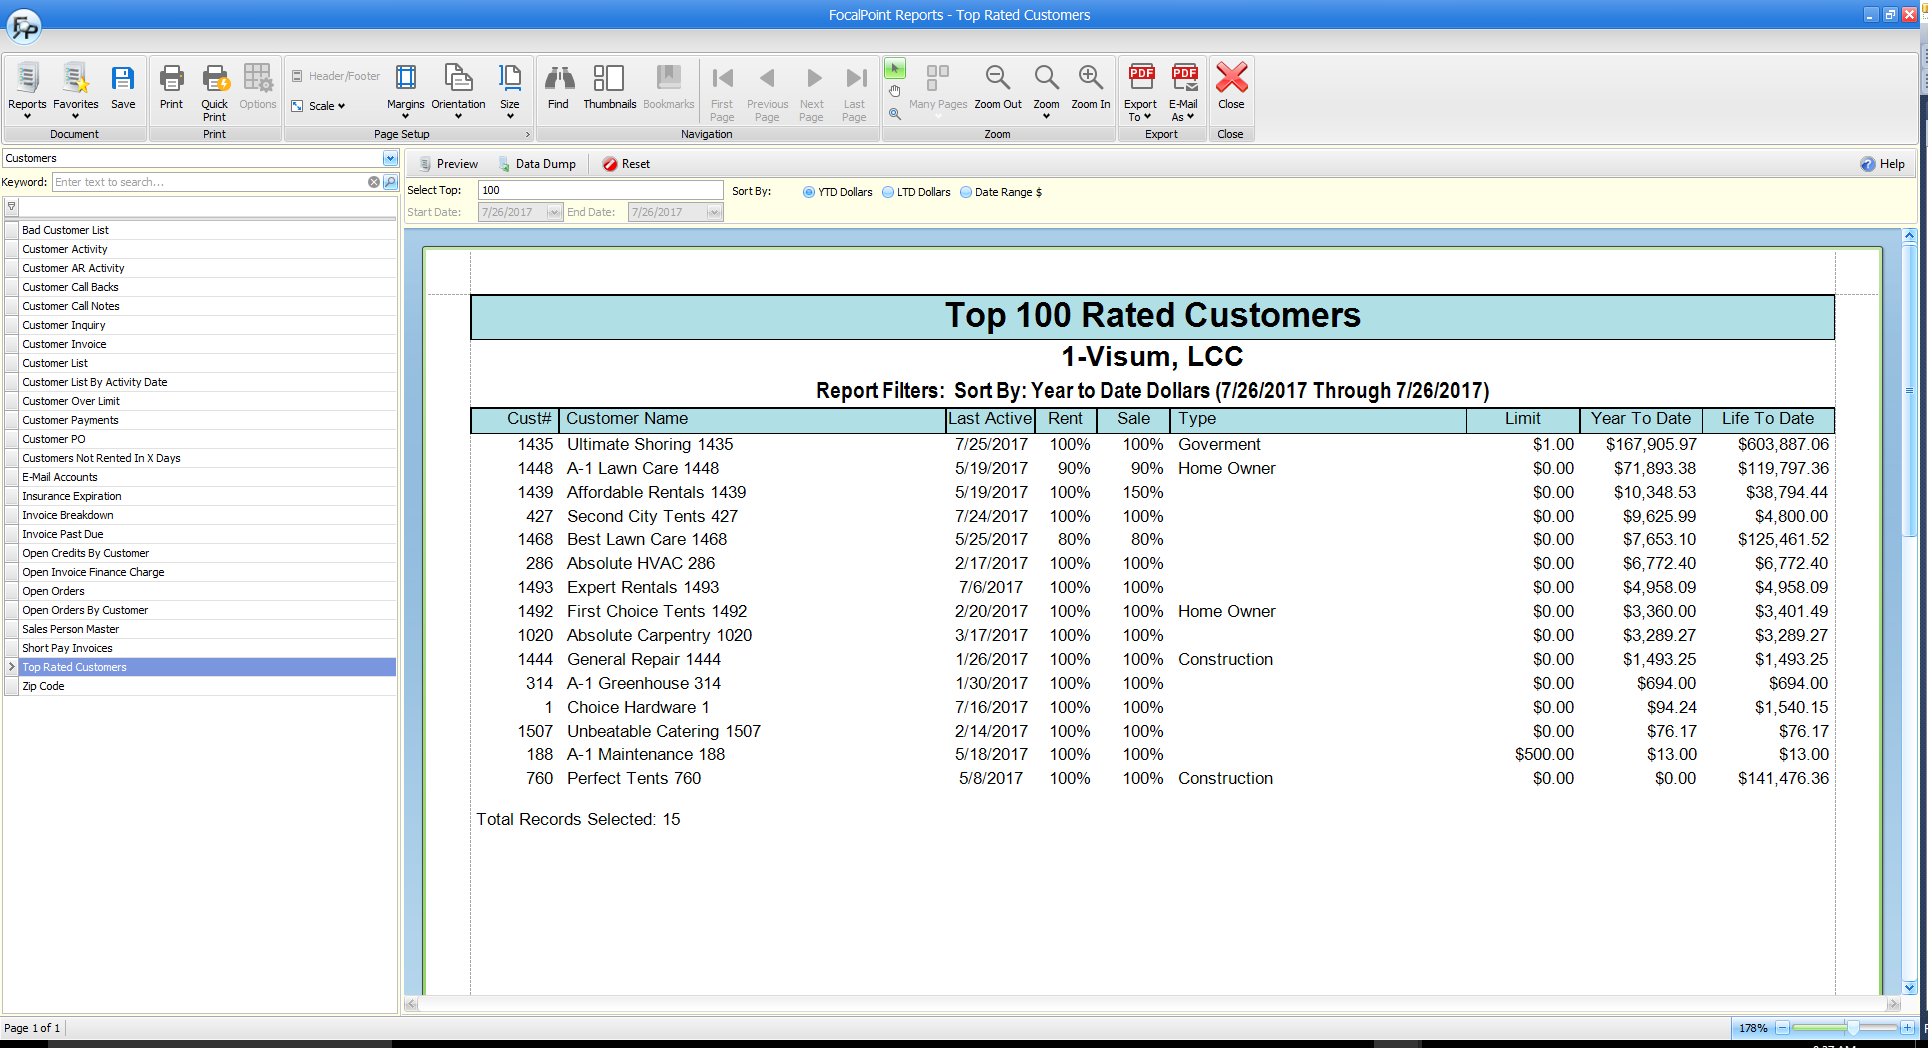
- Top Rated Customers Report
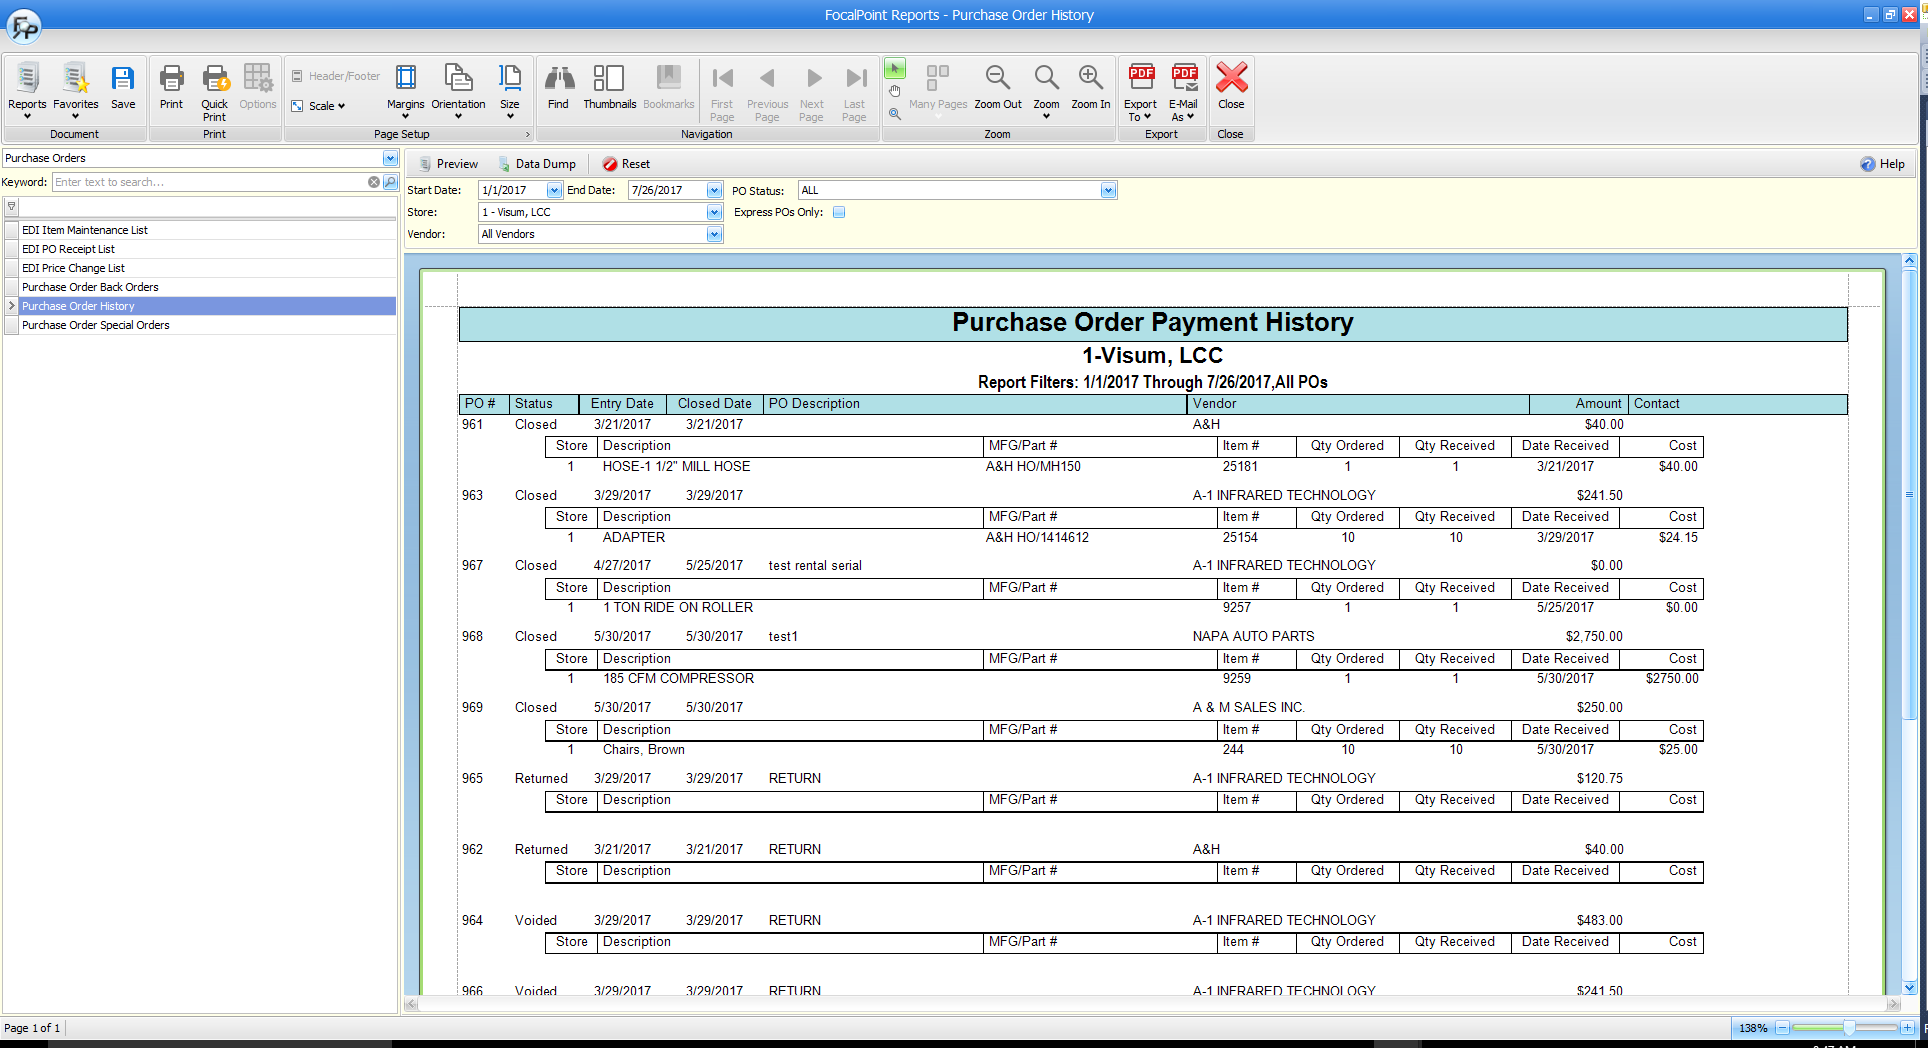
- Purchase Order Payment History Report
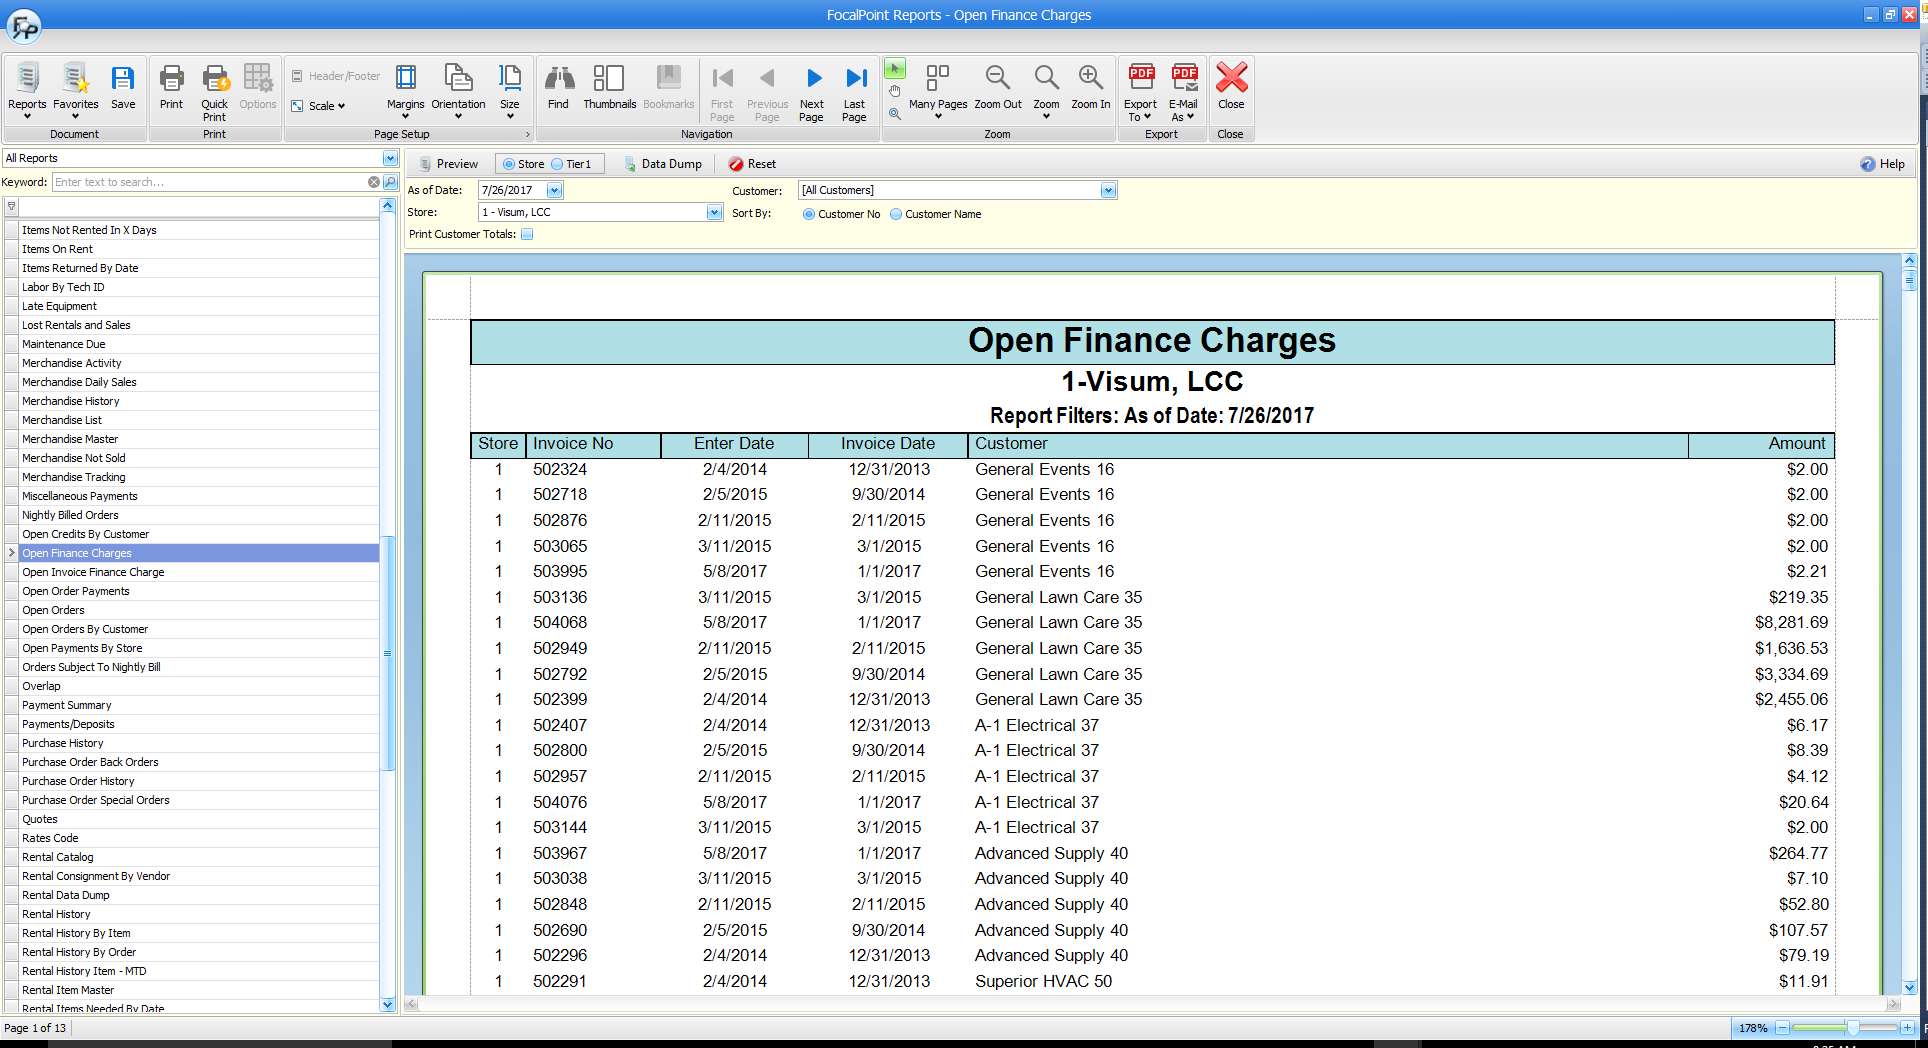
- Open Finance Charges Report
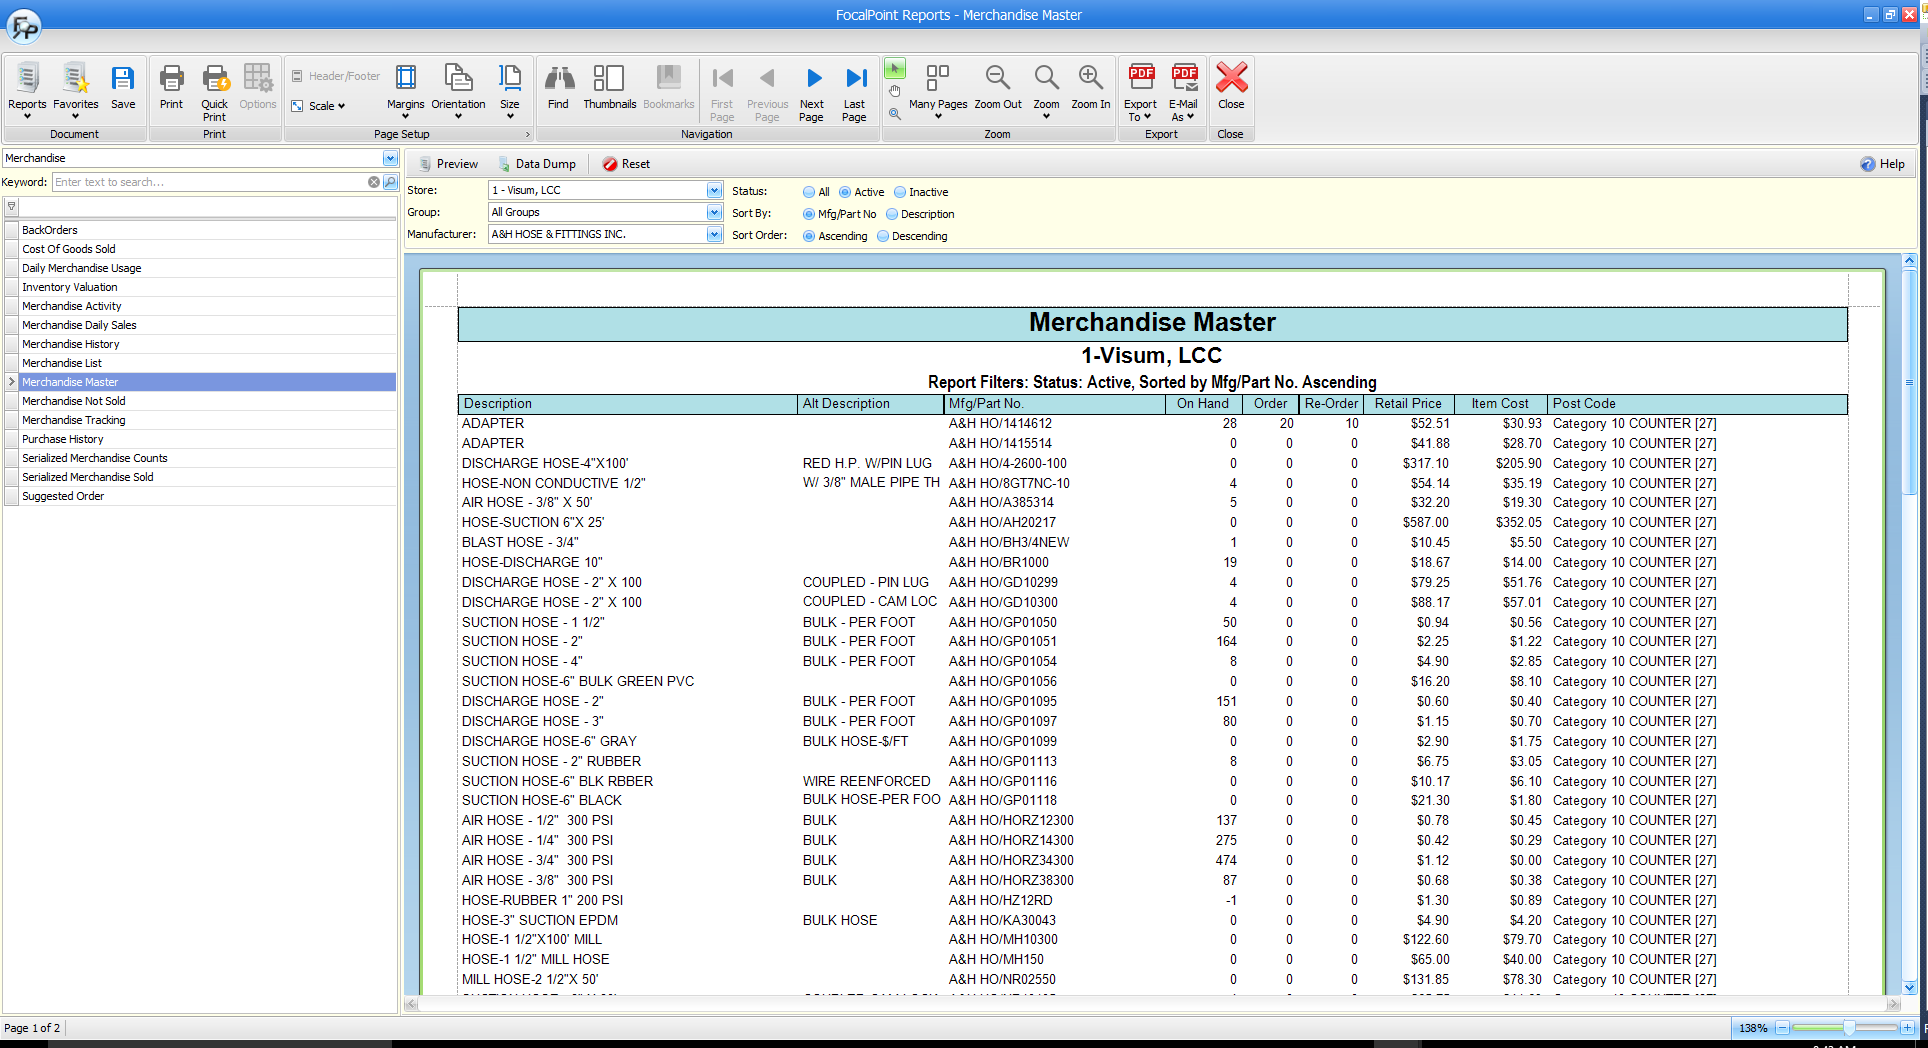
- Merchandise Master Report
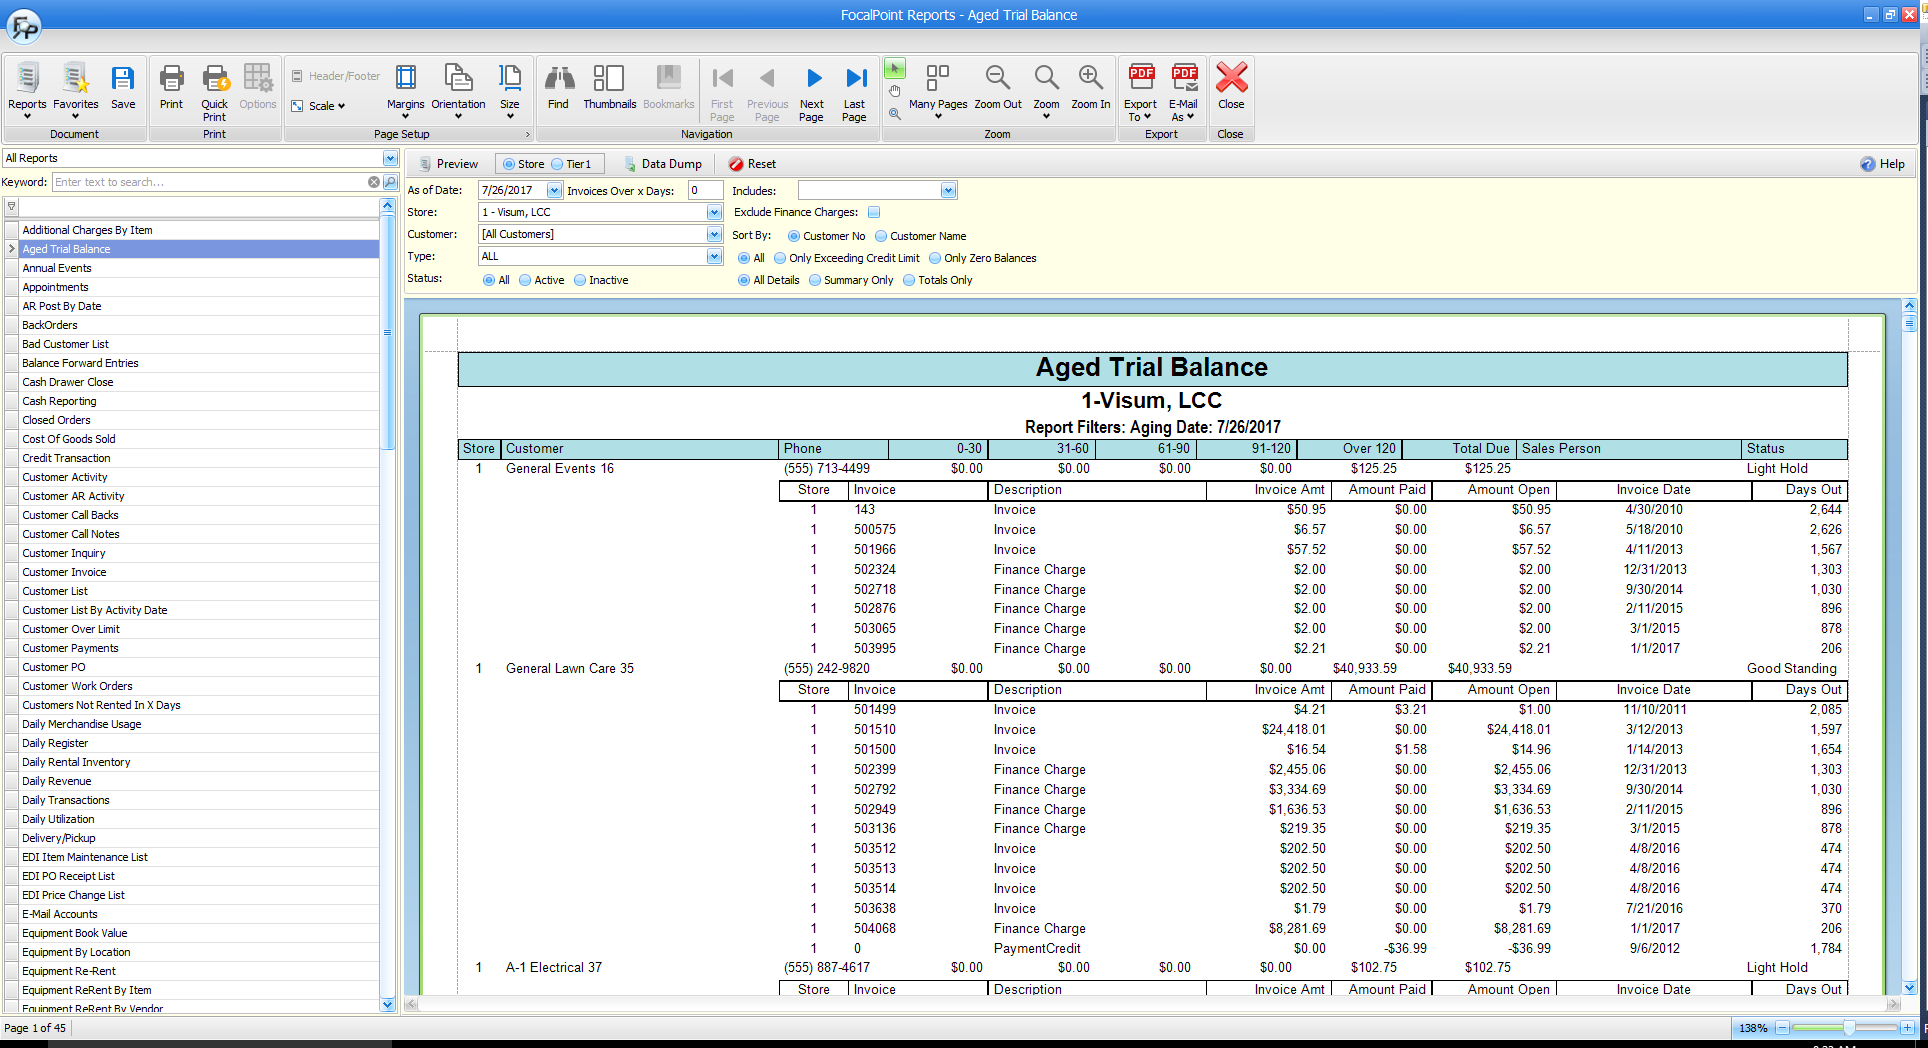
- Aged Trial Balance Report
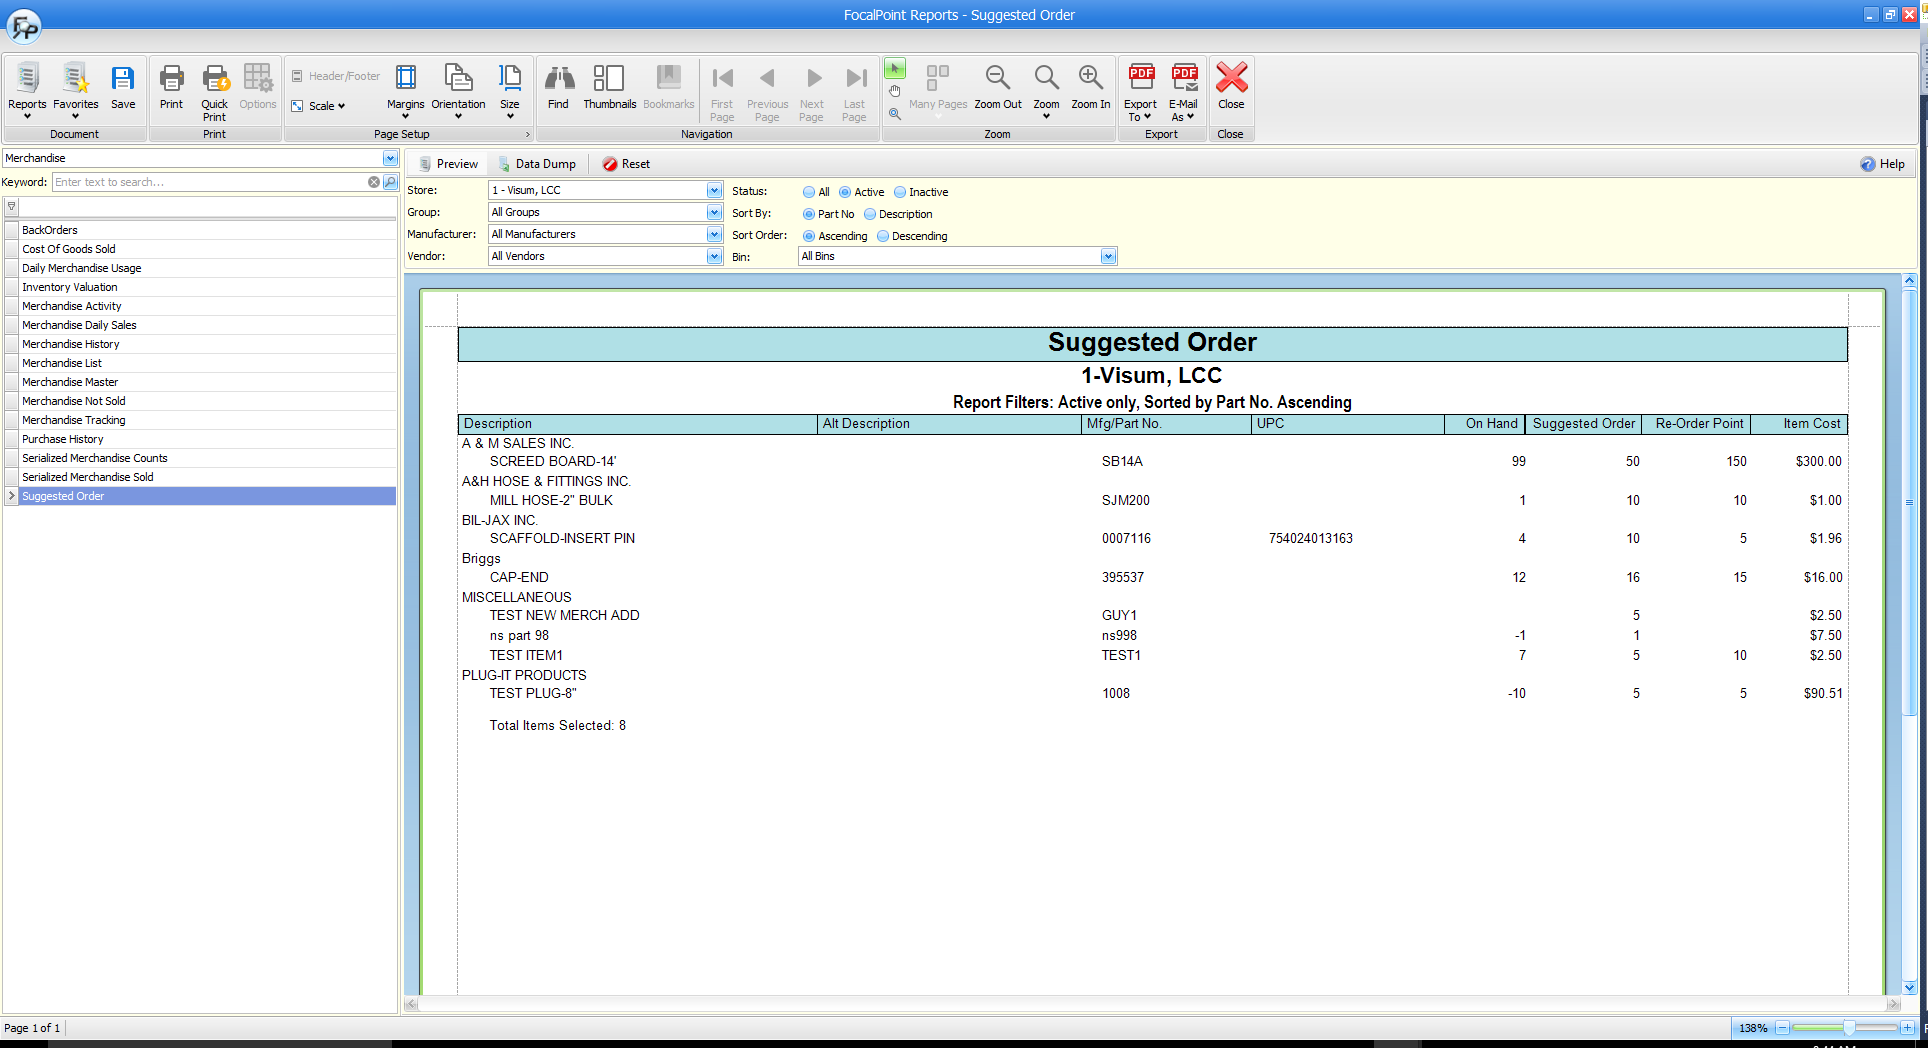
- Suggested Order Report
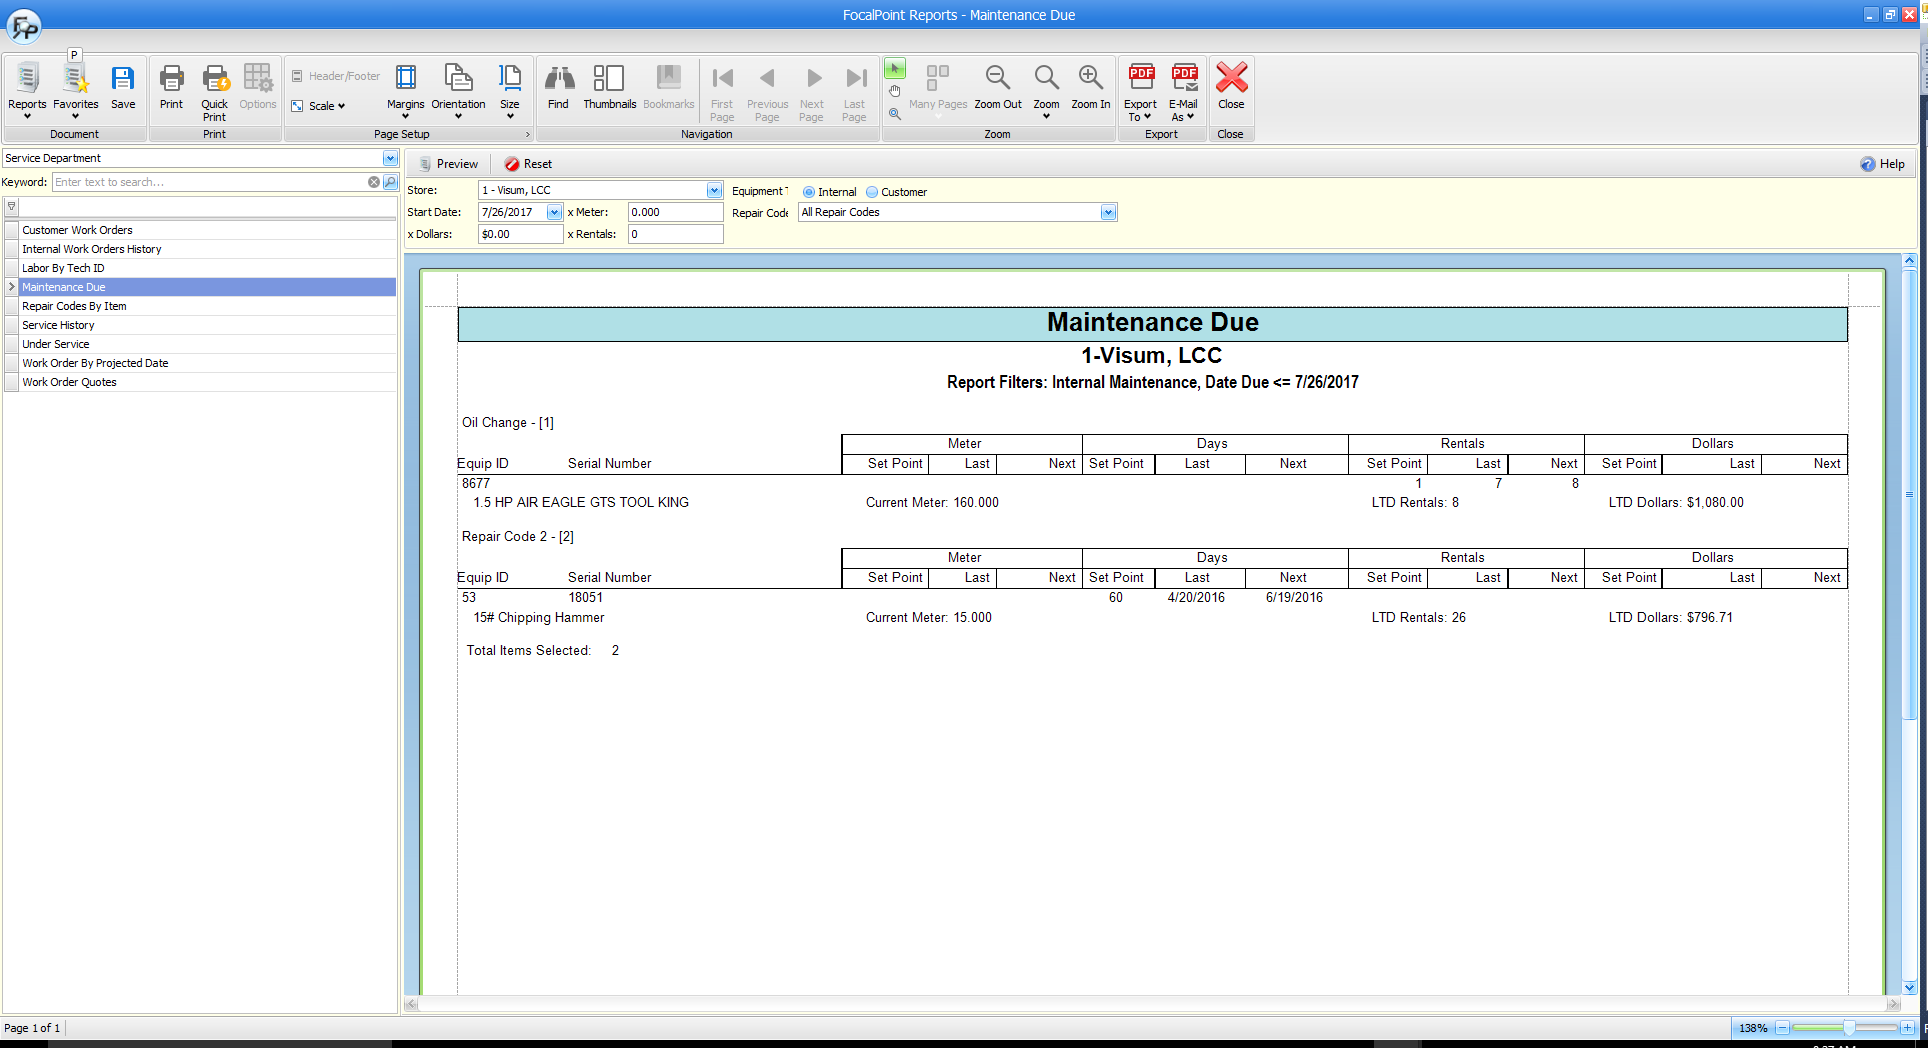
- Maintenance Due Report
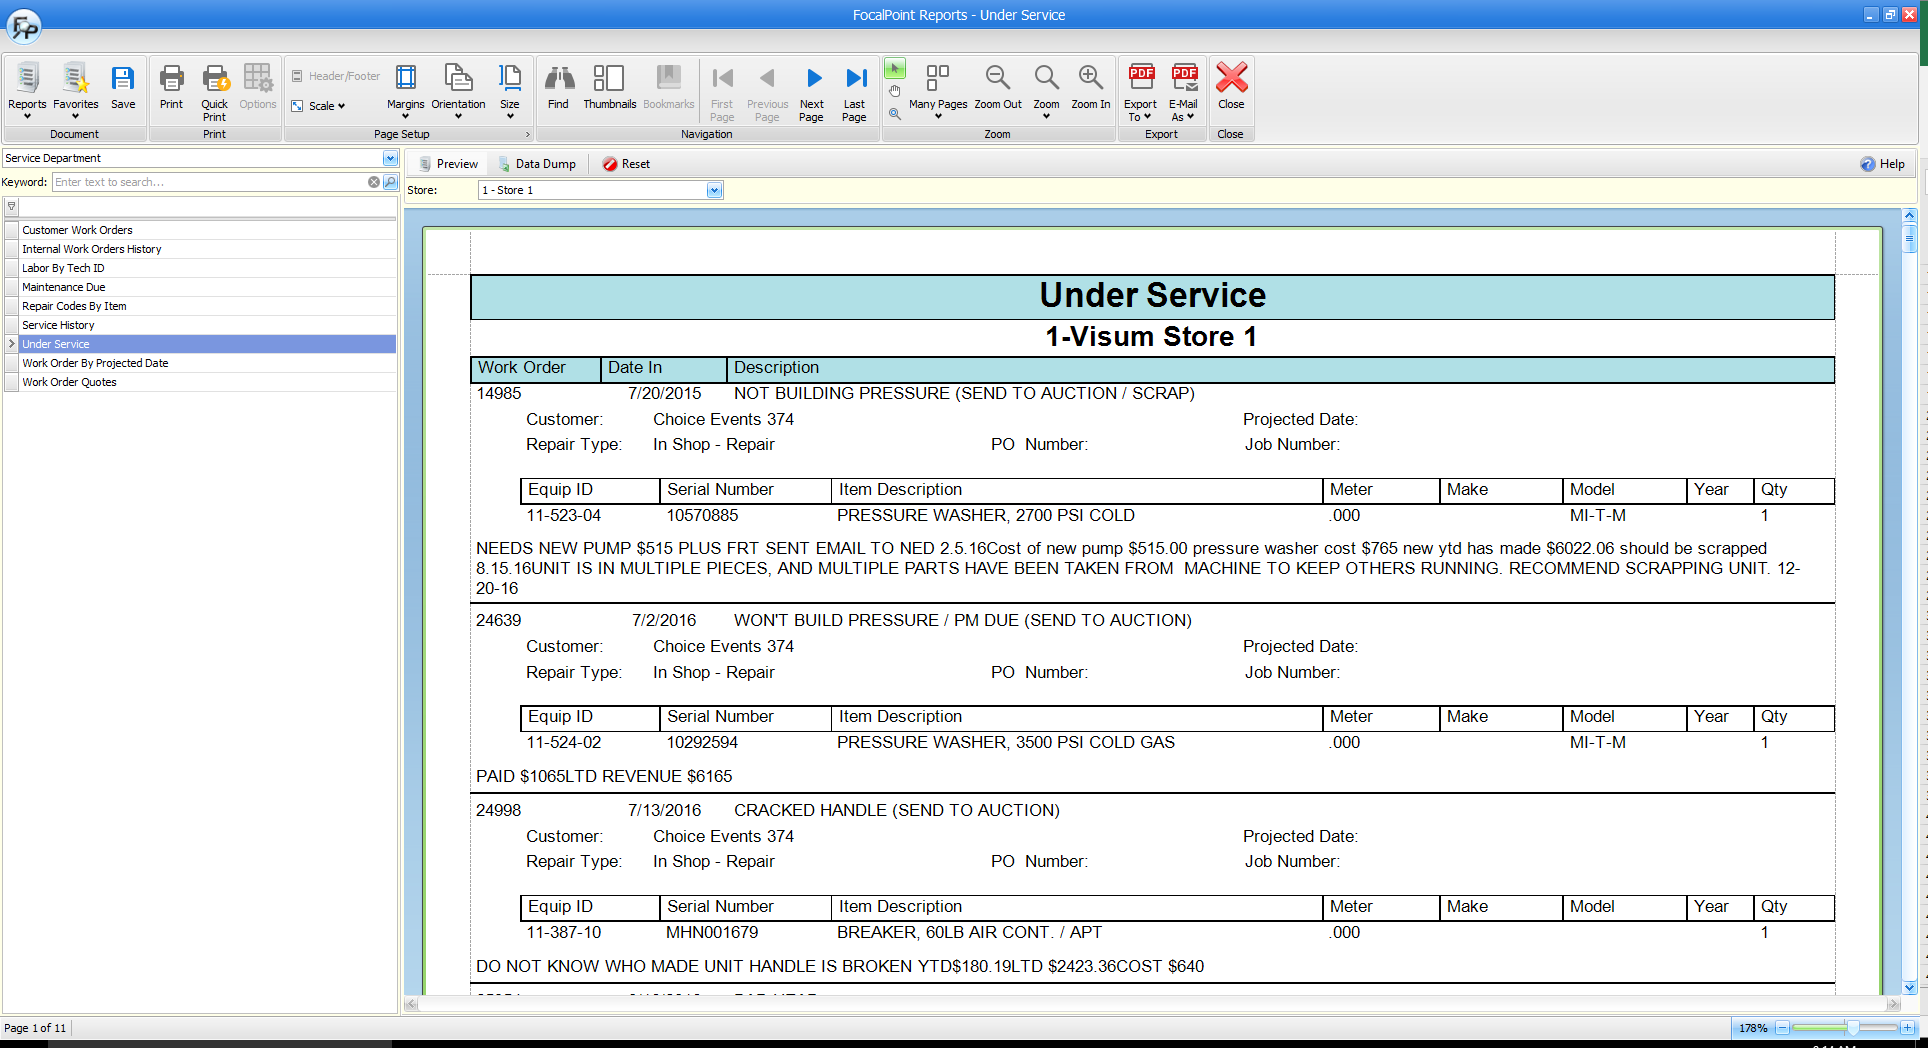
- Under Service Report
See below for screenshots of the new reports.
This is only a brief introduction to the new reporting capabilities in FocalPoint. To learn more about these new reports, be sure to attend an upcoming webinar that will be announced soon.